Friday, 10 June 2016

Ruby on Rails Linux Installations

We are installing Ruby On Rails on Linux using rbenv. It is a lightweight Ruby Version Management Tool. The rbenv provides an easy installation procedure to manage various versions of Ruby, and a solid environment for developing Ruby on Rails applications.


Follow the steps given below to install Ruby on Rails using rbenv tool.

Install Prerequisite Dependencies


 tp> sudo yum install -y git-core zlib zlib-devel gcc-c++ patch readline readline-devel libyaml-devel libffi-devel openssl-devel make bzip2 autoconf automake libtool bison curl sqlite-devel

Install rbenv

Now we will install rbenv and set the appropriate environment variables. Use the following set of commands to get rbenv for git repository.
tp> git clone git://github.com/sstephenson/rbenv.git .rbenv
tp> echo 'export PATH = "$HOME/.rbenv/bin:$PATH"' >> ~/.bash_profile
tp> echo 'eval "$(rbenv init -)"' >> ~/.bash_profile
tp> exec $SHELL

tp> git clone git://github.com/sstephenson/ruby-build.git ~/.rbenv/plugins/ruby-build
tp> echo 'export PATH = "$HOME/.rbenv/plugins/ruby-build/bin:$PATH"' << ~/.bash_profile
tp> exec $SHELL

Install Ruby

Before installing Ruby, determine which version of Ruby you want to install. We will install Ruby 2.2.3. Use the following command for installing Ruby.
tp> rbenv install -v 2.2.3
Use the following command for setting up the current Ruby version as default.
tp> rbenv global 2.2.3
Use the following command to verify the Ruby version.
tp> ruby -v

Output

ruby 2.2.3p173 (2015-08-18 revivion 51636) [X86_64-linux]
Ruby provides a keyword gem for installing the supported dependencies; we call them gems. If you don't want to install the documentation for Ruby-gems, then use the following command.
tp> echo "gem: --no-document" > ~/.gemrc
Thereafter, it is better to install the Bundler gem, because it helps to manage your application dependencies. Use the following command to install bundler gem.
tp> gem install bundler

Install Rails

Use the following command for installing Rails version 4.2.4.
tp> install rails -v 4.2.4
Use the following command to make Rails executable available.
tp> rbenv rehash
Use the following command for checking the rails version.
tp> rails -v

Output

tp> Rails 4.2.4
Ruby on Rails framework requires JavaScript Runtime Environment (Node.js) to manage the features of Rails. Next, we will see how we can use Node.js to manage Asset Pipeline which is a Rails feature.

Install JavaScript Runtime

Let us install Node.js from the Yum repository. We will take Node.js from EPEL yum repository. Use the following command to add the EPEL package to the yum repository.
tp> sudo yum -y install epel-release
Use the following command for installing the Node.js package.
tp> sudo yum install nodejs

Create new default application with the following command

tp> rails new demo

Now Install dependency file using the following bundle command.

tp> bundle install

Now start the server using the following rails command

tp> ralis s     (or)  rails server

Now we will aim for setting up the oracle database
Open the database.yml file, and update the following database connection details Path for database.yml file is  config/database.yml

    development:
    adapter: oracle_enhanced
    database: databasename
    host:  Ipaddress/databasename
    username: xxxxxx
    password: xxxxxx

Add the following 2 lines in the gemfile under the following path.
/<projectname>/Gemfile

gem 'activerecord-oracle_enhanced-adapter'
gem 'ruby-oci8'

Now connecting to the oracle database we should have following tool gem installation

     tp> gem install activerecord-oracle_enhanced-adapter

        tp> gem install ruby-oci8

But ruby-oci8 fail due to lack of libraries. We need have oracle instant client to include the libraries.
Follow the below process to install ruby-oci8


Install: -     Instant Client Package – Basic
                   Instant Client Package – SDK
Unzip those zip files under your home directory

tp> unzip zip file name Instant Client Package – Basic

tp> unzip zip file name Instant Client Package – SDK

Copy the sdk folder from Instant Client Package – SDK and copy to Instant Client Package – Basic to include missing oci.h file

Now we must include the path

tp> vi .bashrc

export LD_LIBRARY_PATH=/home/liginauthor/instantclient_12_1
export PATH=$PATH:$LD_LIBRARY_PATH
export PATH


tp> vi bashprofile

PATH=$PATH:$HOME
export PATH
eval "$(rbenv init -)"

To make this change more permanent edit your config/boot.rb and add this:

require 'rails/commands/server'
module Rails
  class Server
    def default_options
      super.merge(Host:  '0.0.0.0', Port: 3000)
    end
  end
end

Note:- While installing ruby oci8 we may get an error for creating a creating a soft link  just follow the instructions to fix the problem

Now set the etc host
Add your host name to its Ip address

tp> vi /etc/hosts

Run rails s
Stop scaffold-->  spring stop
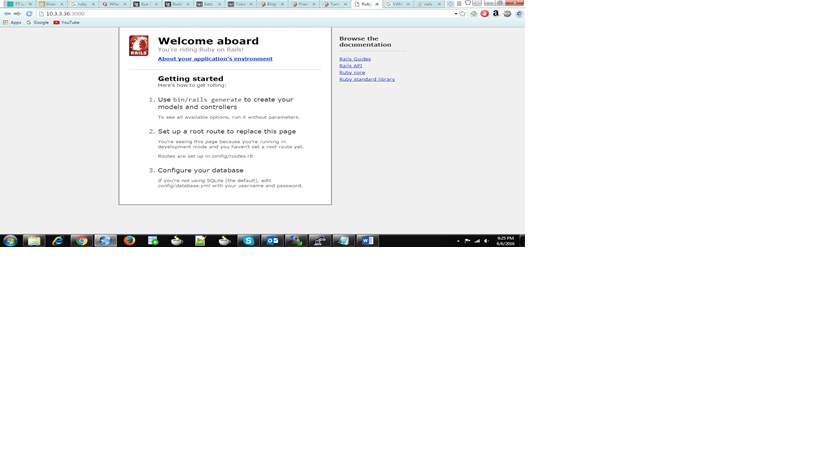
Wednesday, 25 May 2016

Ruby on Rails Windows Installation

WHY RUBY ON RAILS?

Many platforms are available for Web development including Microsoft’s .NET, Java 2 Enterprise Edition, and PHP. Why, then, is there so much interest in a new platform using a relatively unfamiliar language? 
By its design, Ruby on Rails (RoR) lets you develop Web applications very quickly. It does this by adhering to conventions rather than forcing you to make all of your configuration decisions upfront. As a result, RoR lets you develop running applications in a surprisingly short length of time. Once you install Ruby and its various required packages, you can create a minimal Web application by running less than a half-dozen commands and editing one file (database.yml). RoR includes code generators or libraries that address many of the most common Web development tasks. The Ruby language has the object-oriented capabilities of a language like Java, yet you can also use it to create simple scripts. The language’s range of capabilities increases your ability to create applications without having to resort to numerous divergent technologies.

DEFINITIONS

What is Ruby?

Ruby is an object-oriented interpreted scripting language created by Yukihiro Matsumoto. Since the mid-1990s, it has grown in popularity in Japan and has gained recent attention as the language behind the Rails framework. You can use the language for a striking variety of functions—from basic scripting to creating Windows applications to developing Web applications. You can start using Rails without extensive knowledge of the language; the Rails framework generates the fundamental classes needed for the Web application and uses reflection to perform object-relational mapping to the database.

What is Rails?

Rails is a Web application and persistence framework created by David Heinemeier Hansson. It includes the infrastructure you need to create database-backed Web applications that use the Model-View-Control (MVC) pattern. Rails has gained attention as a development framework that lets you rapidly create full-featured database-backed Web applications.

What is the Model-View-Controller Pattern (MVC)?

The MVC design pattern is used to separate the following concerns of an application:
Model:
Application data, including validation rules
View:
The way data is presented to the end user
Controller:
The way a user manipulates the data within the model
This pattern has become popular for Web application development, but it has existed for much longer. Implementations of the pattern have been refined over time and products have been developed to implement it as a framework. You can use Java projects such as Struts and Hibernate to develop applications that leverage the MVC architecture. 
In the Rails framework, Active Record deals with Model concerns. It maps database tables to Ruby objects and provides many other features, including a way to easily access data, represent and traverse relationships between tables, validate data, and get data summaries. It also lets you use straight SQL when desired.
The Action Controller coordinates interactions between the View and Model layers (letting users change data through the Web). It routes all requests sent to the Web application, provides a filtering mechanism, Web session access, and other features.
The Action View deals with what’s actually displayed to the user (generally in the Web browser). Files that contain HTML and Ruby code are appended with an .rhtml extension. Helper classes are also available to provide data formatting.

What is Ruby Gems?

Ruby Gems (or simply gems) is the Ruby packaging system used to package Rails components. It provides a standard format for distributing Ruby programs and libraries as well as a tool for managing package installation.

What is OCI8?

The Ruby/Oracle Call Interface (OCI8) is a database driver for Ruby/DBI. RubyDBI provides a database-independent interface for Ruby. You install OCI8 to provide a Ruby interface to the underlying Oracle client software. It’s somewhat analogous to ODBC or JDBC.

                                          Rails Installation on Windows

Follow the steps given below for installing Ruby on Rails.

Check Ruby Version

First, check if you already have Ruby installed. Open the command prompt and type ruby -v. If Ruby responds, and if it shows a version number at or above 2.2.3, then type gem --version. If you don't get an error, skip Install Ruby step. Otherwise, we'll install a fresh Ruby.

Install Ruby

If Ruby is not installed, then download an installation package http://rubyinstaller.org/downloads/archives . Follow the download link, and run the resulting installer. This is an exe file rubyinstaller-2.2.3.x.exe and will be installed in a single click. It's a very small package, and you'll get Ruby Gems as well along with this package. Please check the Release Notes for more detail .And also download development kit and extract to same folder.

Install Rails

Install Rails − With Ruby gems loaded, you can install all of Rails and its dependencies using the following command through the command line 
C:\>gem install rails

Note − the above command may take some time to install all dependencies. Make sure you are connected to the internet while installing gems dependencies.

Check Rails Version

Use the following command to check the rails version.
C:\>rails -v

Congratulations! You are now on Rails over Windows.
Note: - Development kit after downloading extracted files placed into Ruby folder

DevKit Overview

The DevKit is a toolkit that makes it easy to build and use native C/C++ extensions such as Rediscount and Red Cloth for Ruby on Windows.
Simply download, double-click, choose an installation directory, run the Ruby install helper script, possibly tweak a config.yml file for your system specifics, and you’re ready to start using native Ruby extensions.

Quick Start

Download it, run it to extract it somewhere (permanent).
Then cd to it, run ruby dk.rb init   and   ruby dk.rb install to bind it to ruby installations in your path.

Test Installation

Confirm your Ruby environment is correctly using the DevKit by running.

C:\>gem install json --platform=ruby

JSON should install correctly and you should see with native extensions in the screen messages.


Keeping Rails Up-to-Date

Assuming you have installed Rails using Ruby Gems, keeping it up-to-date is relatively easy. We can use the same command in both Windows and Linux platform. Use the following command 
C:\> gem update rails

This will automatically update your Rails installation. The next time you restart your application, it will pick up this latest version of Rails. While using this command, make sure you are connected to the internet.

Installation Verification

You can verify if everything is set up according to your requirements or not. Use the following command to create a demo project.
C:\>rails new demo

It will generate a demo rail project; we will discuss about it later. Currently we have to check if the environment is set up or not. Next, use the following command to run WE Brick web server on your machine.
C:\>cd demo

C:\> rails server

It will generate auto-code to start the server
Now open your browser and type the following 
http://localhost:3000

It should display a message, something like, "Welcome aboard" or "Congratulations".


27-03-2019

                                                                  Apex Project Creation 1. Create new project and select desktop applicat...